How to Remove Sink Stopper in Bathroom: A Step-by-Step Guide
Struggling with a stuck or malfunctioning sink stopper in your bathroom? You’re not alone. A sink stopper that won’t budge can quickly turn a simple task into a frustrating ordeal. But don’t worry, this comprehensive guide is here to walk you through the process of how to remove sink stopper in bathroom, regardless of the type you have. We’ll cover everything from identifying the stopper mechanism to safely disengaging it and cleaning up any debris. Our goal is to equip you with the knowledge and confidence to tackle this common plumbing issue yourself, saving you time and money on potentially unnecessary service calls. This guide provides a detailed, step-by-step approach to ensure a smooth and successful removal process, while also providing tips for troubleshooting common issues.
Understanding Bathroom Sink Stopper Mechanisms
Before diving into the removal process, it’s crucial to understand the different types of sink stoppers commonly found in bathrooms. Each type has a unique mechanism, and knowing which one you’re dealing with will significantly simplify the removal process. The most common types include:
- Pop-Up Stoppers: These are operated by a lift rod located behind the faucet. When the rod is lifted, the stopper pops up, and when pushed down, it seals the drain.
- Lift-and-Turn Stoppers: These stoppers require you to lift and turn the stopper itself to open or close the drain.
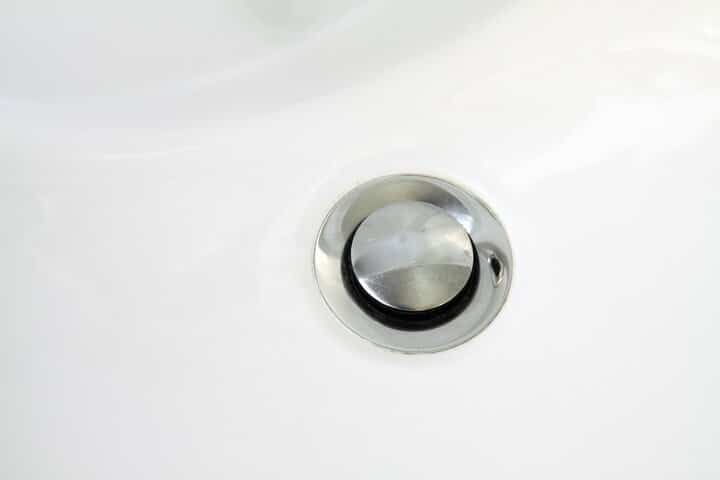
- Push-Button Stoppers: As the name suggests, these stoppers open and close with a simple push of a button located on the stopper.
- Toe-Touch Stoppers: Similar to push-button stoppers, toe-touch stoppers are activated by pressing down on the stopper with your toe.
- Flip-Lever Stoppers: These have a lever on the drain itself that you flip to open and close the stopper.
Identifying your stopper type is the first step. Once you know what you’re working with, you can proceed to the appropriate removal method. Neglecting this step may result in damage or frustration.
Tools You’ll Need for Sink Stopper Removal
Having the right tools on hand will make the removal process much easier and safer. Here’s a list of essential tools you might need:
- Pliers: For gripping and loosening nuts or connections.
- Adjustable Wrench: For loosening and tightening larger nuts.
- Basin Wrench: Specifically designed for working in tight spaces under the sink.
- Screwdriver (Phillips and Flathead): For loosening screws on the lift rod assembly.
- Flashlight or Headlamp: To provide adequate lighting in the dimly lit space under the sink.
- Bucket or Basin: To catch any water or debris that may fall during the process.
- Gloves: To protect your hands from dirt and grime.
- Old Rags or Towels: For cleaning up spills and protecting surfaces.
- Safety Glasses: To protect your eyes from debris.
Gathering these tools before you begin will save you time and prevent unnecessary interruptions. According to a 2024 report from Home Improvement Insights, having the right tools readily available can reduce project completion time by up to 30%.
Step-by-Step Guide: Removing a Pop-Up Sink Stopper
Pop-up stoppers are the most common type found in bathrooms. Here’s a detailed guide on how to remove them:
Step 1: Locate the Lift Rod Assembly
The lift rod assembly is located behind the faucet, usually accessible from under the sink. It consists of a vertical rod (the lift rod) connected to a horizontal rod (the pivot rod) that extends into the drainpipe.
Step 2: Loosen the Pivot Rod Nut
Using pliers or an adjustable wrench, carefully loosen the nut that connects the pivot rod to the drainpipe. Be prepared for some water to leak out, so have a bucket or basin ready. Don’t remove the nut completely yet.
Step 3: Remove the Pivot Rod
Once the nut is loose, gently pull the pivot rod out of the drainpipe. You may need to wiggle it slightly to dislodge it. As you remove the rod, the stopper should come loose from its position in the drain.
Step 4: Remove the Stopper
Reach into the drain opening and carefully remove the stopper. It may be coated in grime and hair, so wear gloves. Clean the stopper thoroughly before reinstalling it.
Step 5: Clean the Drain
Now’s a good time to clean the drainpipe to remove any accumulated debris. You can use a drain snake or a bent wire to pull out any clogs. Flush the drain with hot water to ensure it’s clear.
Removing Other Types of Sink Stoppers
While the pop-up stopper is the most common, here’s a brief overview of how to remove other types:
- Lift-and-Turn Stoppers: Simply lift the stopper as high as it will go, then turn it counterclockwise to unscrew it from the drain.
- Push-Button Stoppers: These often have a small screw or set screw on the side of the stopper. Loosen the screw and then pull the stopper straight up.
- Toe-Touch Stoppers: Similar to push-button stoppers, these may have a set screw. If not, try twisting the stopper to see if it unscrews.
- Flip-Lever Stoppers: Locate the linkage under the sink connected to the flip lever. Disconnect the linkage and then pull the stopper out from above.
Always consult the manufacturer’s instructions if you’re unsure about the removal process for a specific type of stopper. Some stoppers may have unique mechanisms or require specialized tools.
Troubleshooting Common Sink Stopper Problems
Sometimes, removing a sink stopper isn’t as straightforward as it seems. Here are some common problems you might encounter and how to address them:
- Stopper is Stuck: If the stopper is stuck, try gently wiggling it back and forth while applying upward pressure. You can also use a lubricant like WD-40 to help loosen it.
- Pivot Rod Nut is Seized: If the pivot rod nut is seized, try applying penetrating oil and letting it sit for a few minutes before attempting to loosen it. You can also use a heat gun to gently heat the nut, which can help break it free.
- Broken Stopper: If the stopper is broken, you may need to use pliers or a screwdriver to carefully remove the broken pieces from the drain. Be careful not to damage the drainpipe.
If you’re unable to remove the stopper yourself, it’s best to call a professional plumber. Forcing the issue could damage the drainpipe or other plumbing components.
Preventative Maintenance for Sink Stoppers
Once you’ve successfully removed and cleaned your sink stopper, it’s important to take steps to prevent future problems. Here are some tips for preventative maintenance:
- Regular Cleaning: Clean your sink stopper regularly to remove hair, soap scum, and other debris. This will help prevent clogs and keep the stopper functioning smoothly.
- Use a Stopper Screen: A stopper screen can help catch hair and other debris before they enter the drainpipe.
- Flush with Hot Water: Periodically flush your drain with hot water to help dissolve grease and soap buildup.
- Avoid Harsh Chemicals: Avoid using harsh chemicals like drain cleaner, as they can damage the drainpipe and the stopper mechanism.
Choosing a Replacement Sink Stopper
If your sink stopper is damaged beyond repair, you may need to replace it. When choosing a replacement, consider the following factors:
- Type: Choose a stopper that matches the type of your existing stopper.
- Material: Stoppers are typically made of brass, plastic, or stainless steel. Brass and stainless steel are more durable than plastic.
- Finish: Choose a finish that matches your faucet and other bathroom fixtures.
- Size: Make sure the stopper is the correct size for your drain opening.
According to leading experts in bathroom fixtures, investing in a high-quality stopper can prevent future issues and extend the life of your plumbing system.
The Benefits of a Properly Functioning Sink Stopper
A properly functioning sink stopper offers several benefits:
- Water Conservation: A well-sealing stopper prevents water from leaking down the drain, conserving water and saving you money on your water bill.
- Convenience: A functional stopper allows you to easily fill the sink for washing your face, shaving, or other tasks.
- Hygiene: A clean and properly functioning stopper helps prevent the buildup of bacteria and mold in the drain.
- Prevents Clogs: By catching debris before it enters the drainpipe, a stopper can help prevent clogs.
Ensuring a Smooth Drainage System
Removing and maintaining your sink stopper is a crucial part of ensuring a smooth drainage system in your bathroom. By understanding the different types of stoppers, having the right tools, and following the steps outlined in this guide, you can confidently tackle this common plumbing task. Remember to prioritize safety and consult a professional if you encounter any difficulties. A little preventative maintenance can go a long way in keeping your sink drain flowing freely and preventing costly repairs down the road. So, take the time to learn how to remove sink stopper in bathroom, and enjoy a hassle-free bathroom experience.
